Audio Clip/Track Options
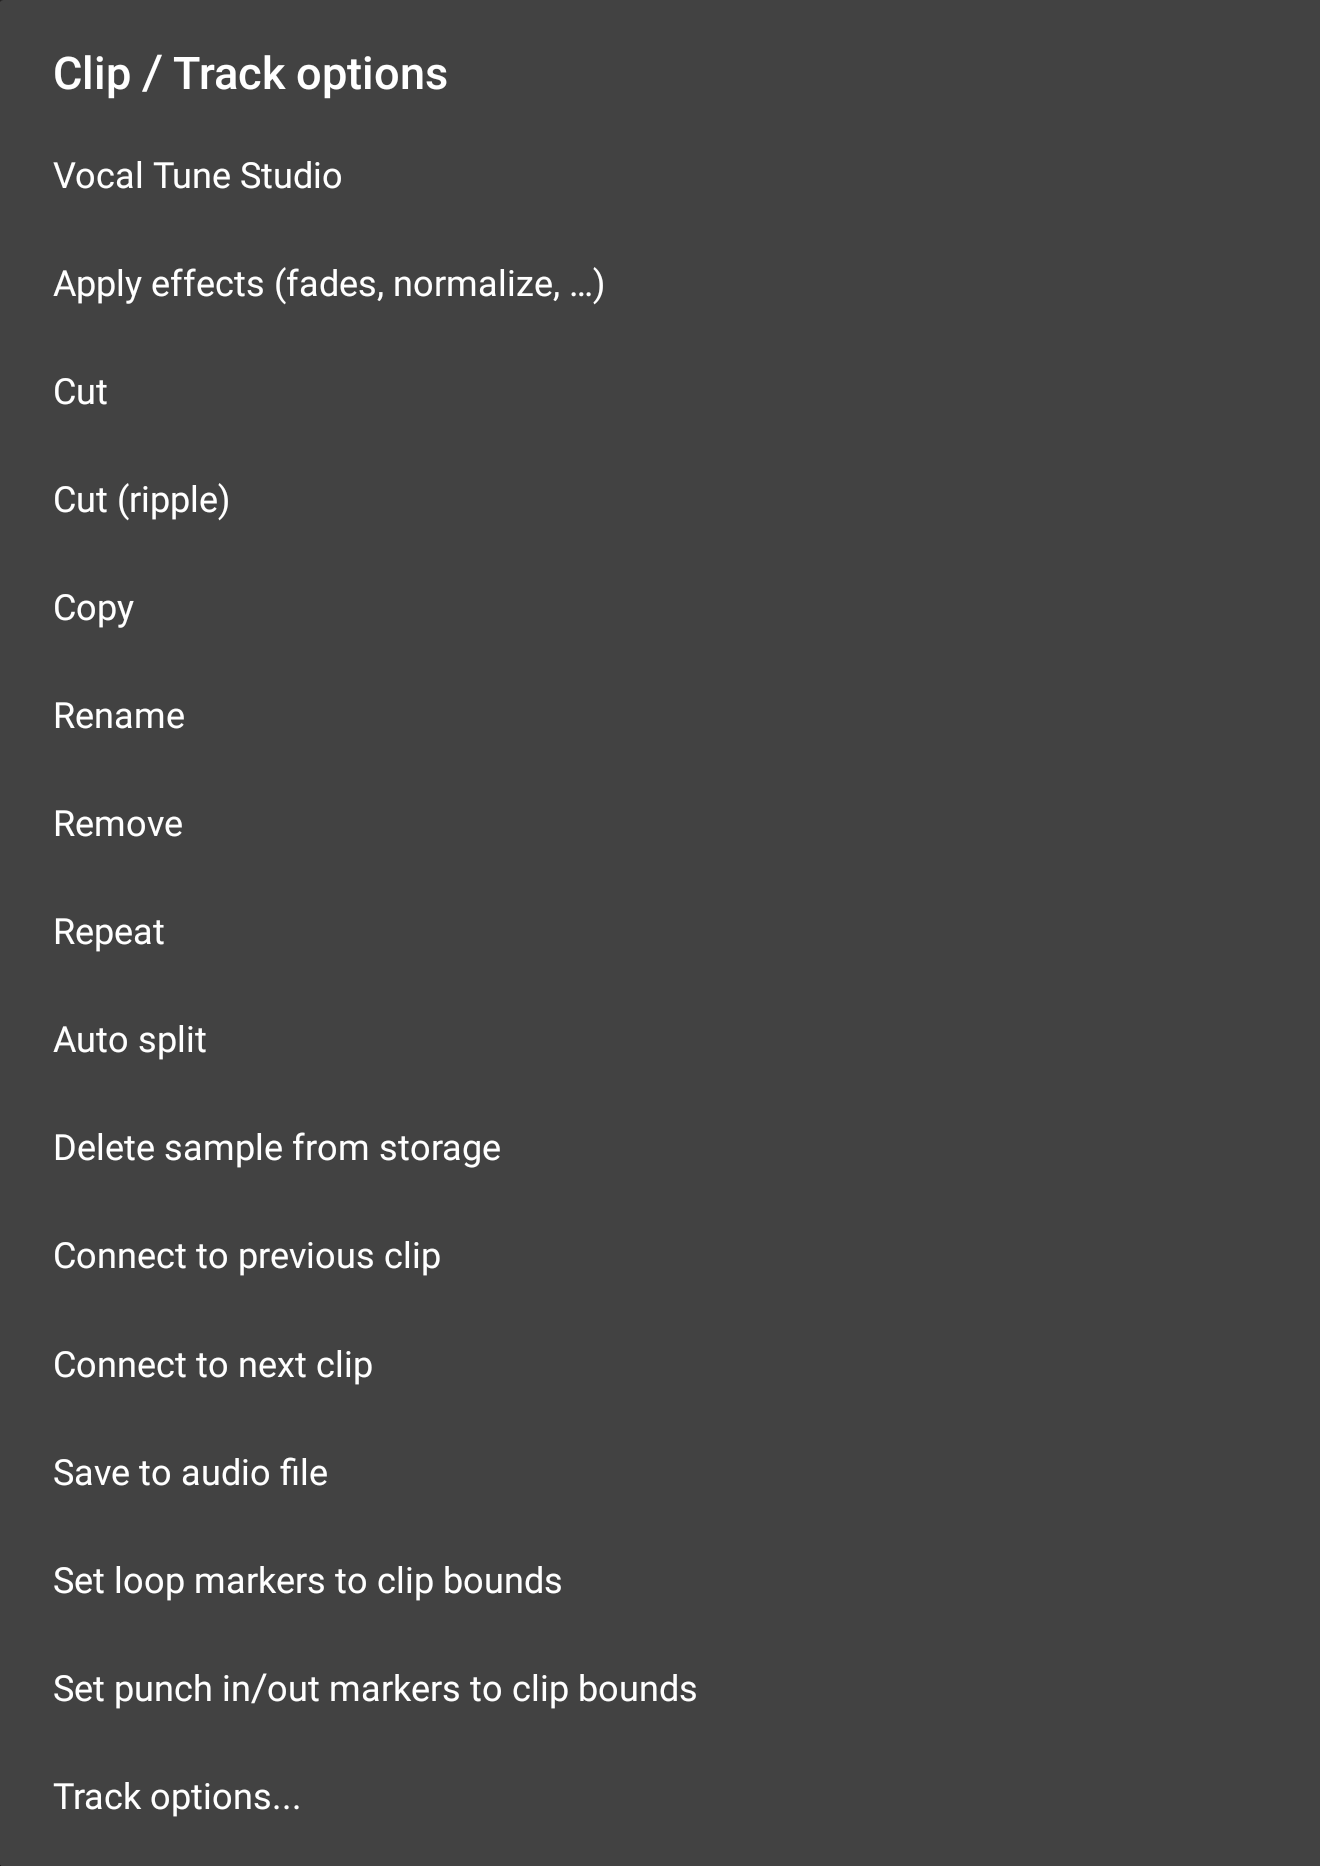
To open the Clip/Track Options menu in Beginner mode, please activate Scroll ![]() mode first, then long press on a clip to open the menu. In Expert mode, please tap on the three dot button of a selected audio clip.
mode first, then long press on a clip to open the menu. In Expert mode, please tap on the three dot button of a selected audio clip.
NOTE. Paste will also be displayed if something has been copied to the clipboard. Please note that only audio can be pasted onto an audio track and only MIDI data can be pasted onto a MIDI track. For full details on pasting content, please see here.
Vocal Tune Studio opens a dialog which allows you to open an audio clip in Vocal Tune Studio, eXtreme Software Development's pitch and timing editor for solo vocal recordings (and time stretching editor for all forms of audio). Vocal Tune Studio is available as an in-app purchase within Audio Evolution Mobile though it is possible to run it in trial mode (with occasional silence played during playback and all forms of export involving Vocal Tune Studio blocked), allowing you to fully evaluate before buying. As long as the option is selected in the Settings ![]() (as it is by default), audio clips can also be opened in Vocal Tune Studio by double tapping on the clip on the Arranger Screen. More details and links to Vocal Tune Studio's own dedicated user manual can be found here.
(as it is by default), audio clips can also be opened in Vocal Tune Studio by double tapping on the clip on the Arranger Screen. More details and links to Vocal Tune Studio's own dedicated user manual can be found here.
Apply effects (fades, normalize...) is where you can apply various types of processing to the audio clip. These effects differ from those on the FX Grid in that the processing is applied to the audio waveform and then rendered/saved directly to a copy of the original audio file. You can always undo this process which will swap out the processed clip by the original clip. Pressing the Apply effects option opens the Effects selection dialog seen here.
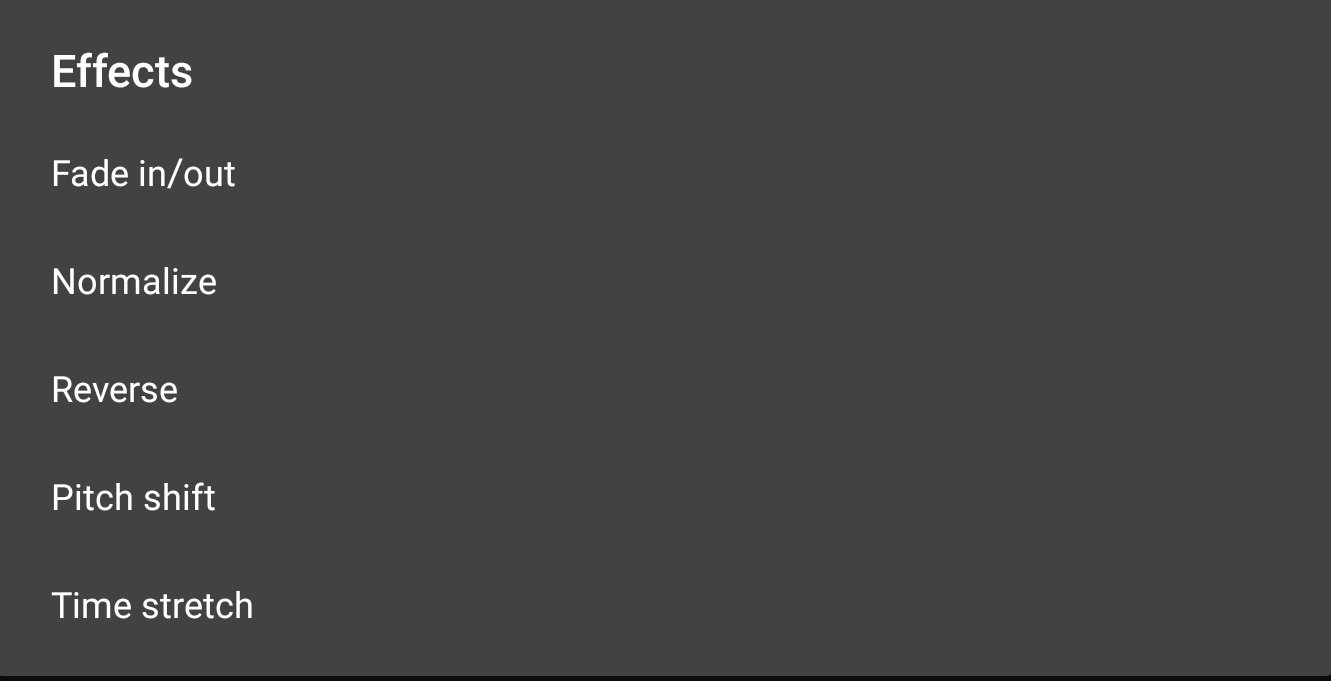
The Effects selection dialog allows you to select the type of effect you want to apply to your audio. The different effects, and how to use them are fully covered in the Editing Audio section: please use the links to jump to these definitions.
- Fade in/out allows you to apply a fade in and, or, fade out to the selected clip. Unlike when using the volume handles to create a fade in/out, this fade in/out, like all of these effects in this section, is rendered to the waveform itself, physically changing it. For more details, see here.
- Normalize allows you to boost the amplitude (loudness) of the waveform in the clip so that the loudest part matches a user-defined level. It raises all parts of the clip by the same amount meaning the relative volume of loud and quiet parts remains the same. This is very useful, especially when you have your audio input set to 'Mic, no processing, lowest latency' in the Settings
 . For more details, see here.
- Reverse reverses the audio waveform so that it is played in the opposite direction. For more details, see here.
- Pitch shift allows you to alter the pitch of the audio clip without changing its length. Again, remember this is rendered into the clip itself as opposed to when you use the Pitch Shifter or Vocal Tune effects on the FX Grid. For more details, see here.
- Time Stretch allows you to alter the length of the audio clip without changing its pitch. For more details, see here.
Cut removes the clip from the timeline and copies it to the clipboard, allowing you to paste it elsewhere. Paste will also be shown as an option in these Clip/Track Options once something is present on the clipboard but you can also use the Paste ![]() button on the Arranger Screen if you'd rather. Select the track to paste onto by tapping it once and use the Time Marker
button on the Arranger Screen if you'd rather. Select the track to paste onto by tapping it once and use the Time Marker ![]() to define the point at which the copied clip is pasted. If the location specified already contains content, you will be asked if you'd like to Paste or Paste (insert). Selecting Paste will 'remove' (the original content is still there if you use the Clip Trimming Handles to trim the original clips) the content underneath the content pasted. Selecting Paste (insert) will insert your copied content at the point specified and shift everything originally after that point to the right so it is now heard after the inserted content.
to define the point at which the copied clip is pasted. If the location specified already contains content, you will be asked if you'd like to Paste or Paste (insert). Selecting Paste will 'remove' (the original content is still there if you use the Clip Trimming Handles to trim the original clips) the content underneath the content pasted. Selecting Paste (insert) will insert your copied content at the point specified and shift everything originally after that point to the right so it is now heard after the inserted content.
You can also cut the selected clip and paste it to the clipboard without opening these Clip/Track options using the Cut ![]() button on the Arranger Screen, which will then give you the option to cut or cut (ripple), therefore including all of the functionality found through these options.
button on the Arranger Screen, which will then give you the option to cut or cut (ripple), therefore including all of the functionality found through these options.
Cut (ripple) removes the clip from the timeline, copies it to the clipboard AND shifts everything to the right of the clip cut to the left by an amount equal to the length of the clip cut. If, therefore, you have several clips next to each other without any gaps between them and you cut one of the clips using Cut (ripple), all of the clips to the right of it will be moved to the left by the length of the clip cut, meaning it will have been removed and everything else on the track has been shifted to perfectly fill the gap that would have otherwise been left.
Copy copies the selected clip to the clipboard, ready to be pasted elsewhere. You can also copy the selected clip to the clipboard without opening these Clip/Track options using the Copy ![]() button on the Arranger Screen.
button on the Arranger Screen.
Rename opens a dialog which allows you to give the selected clip a specific name. Audio Evolution Mobile automatically names clips for your convenience but if you want to keep things organized to your own preferences and make it easy for you to identify individual clips, this allows you to do so. The clip name is displayed in white at the top left of the clip.
Remove removes the selected clip but DOES NOT copy it to the clipboard as Cut does. You can also remove clips from your project without opening these Clip/Track options by activating the Remove mode using the Remove ![]() button on the Arranger Screen. When active, any clip you tap will be removed.
button on the Arranger Screen. When active, any clip you tap will be removed.
Repeat allows you to create multiple repeats of the selected clip on the track. As can be seen below, pressing Repeat opens a dialog which allows you to specify the number (#) of repeats and if you want to specify intervals at which the repeats will appear you can also do that too. The drop-down intervals selection allows you to choose between Seconds, Milliseconds, Bars, Beats, 1/8 Notes and 1/16 Notes.

As you can see there is also a 'Between clips' checkbox. If checked, the selected amount of interval will be applied between each repeated clip. If it is NOT checked, the selected amount of interval will be applied based on the start position of the clip being copied and so on for every subsequent repeat.
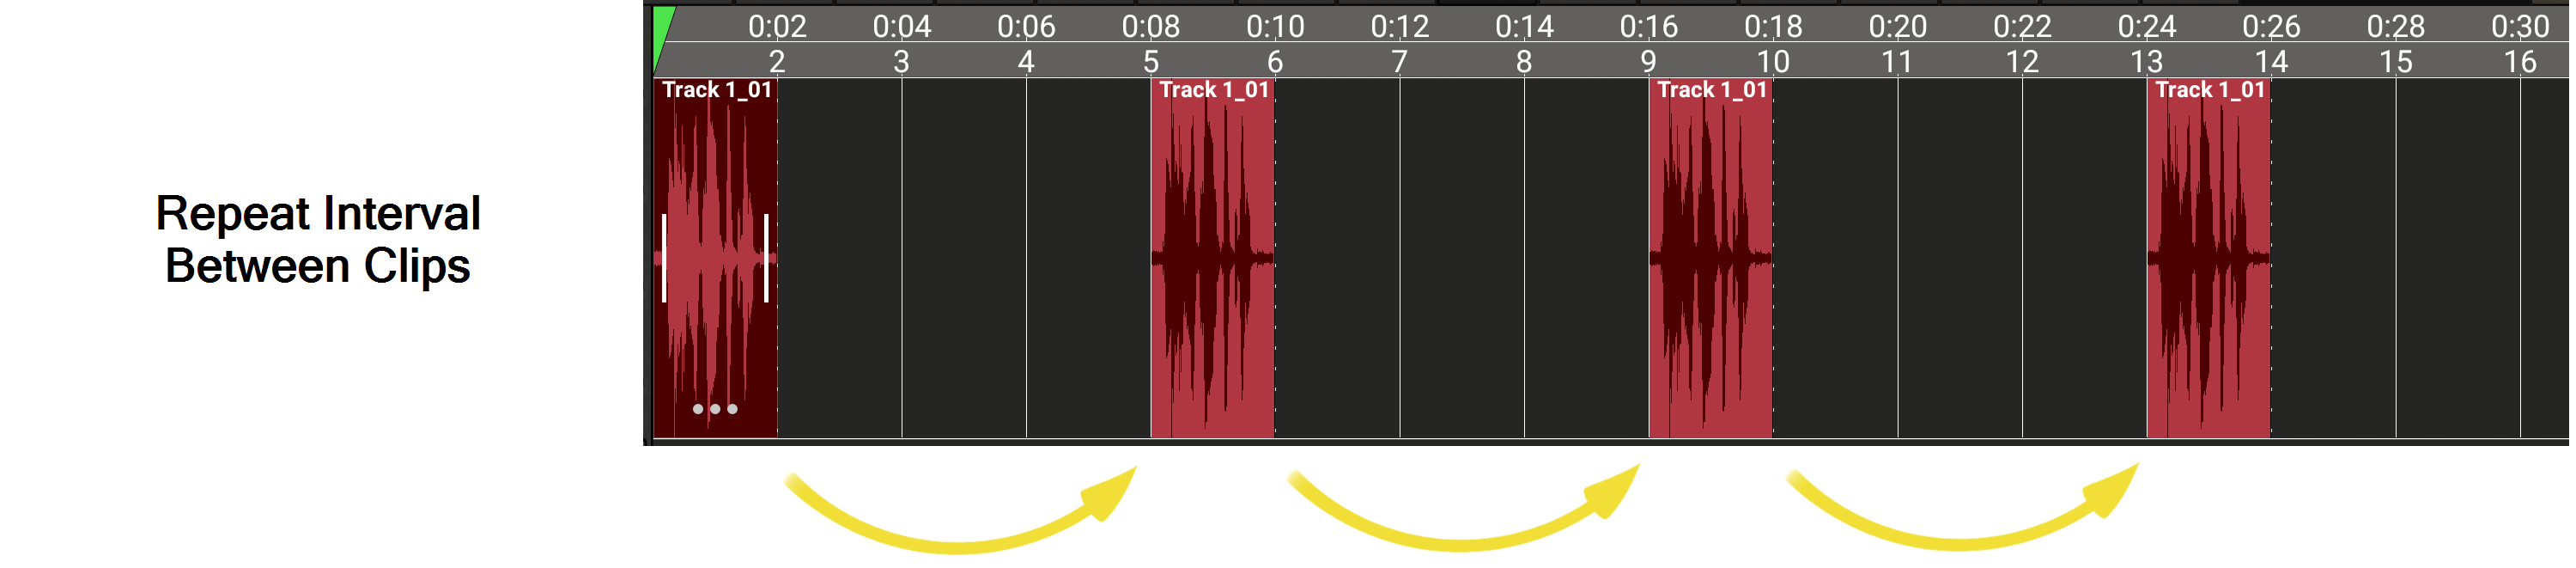
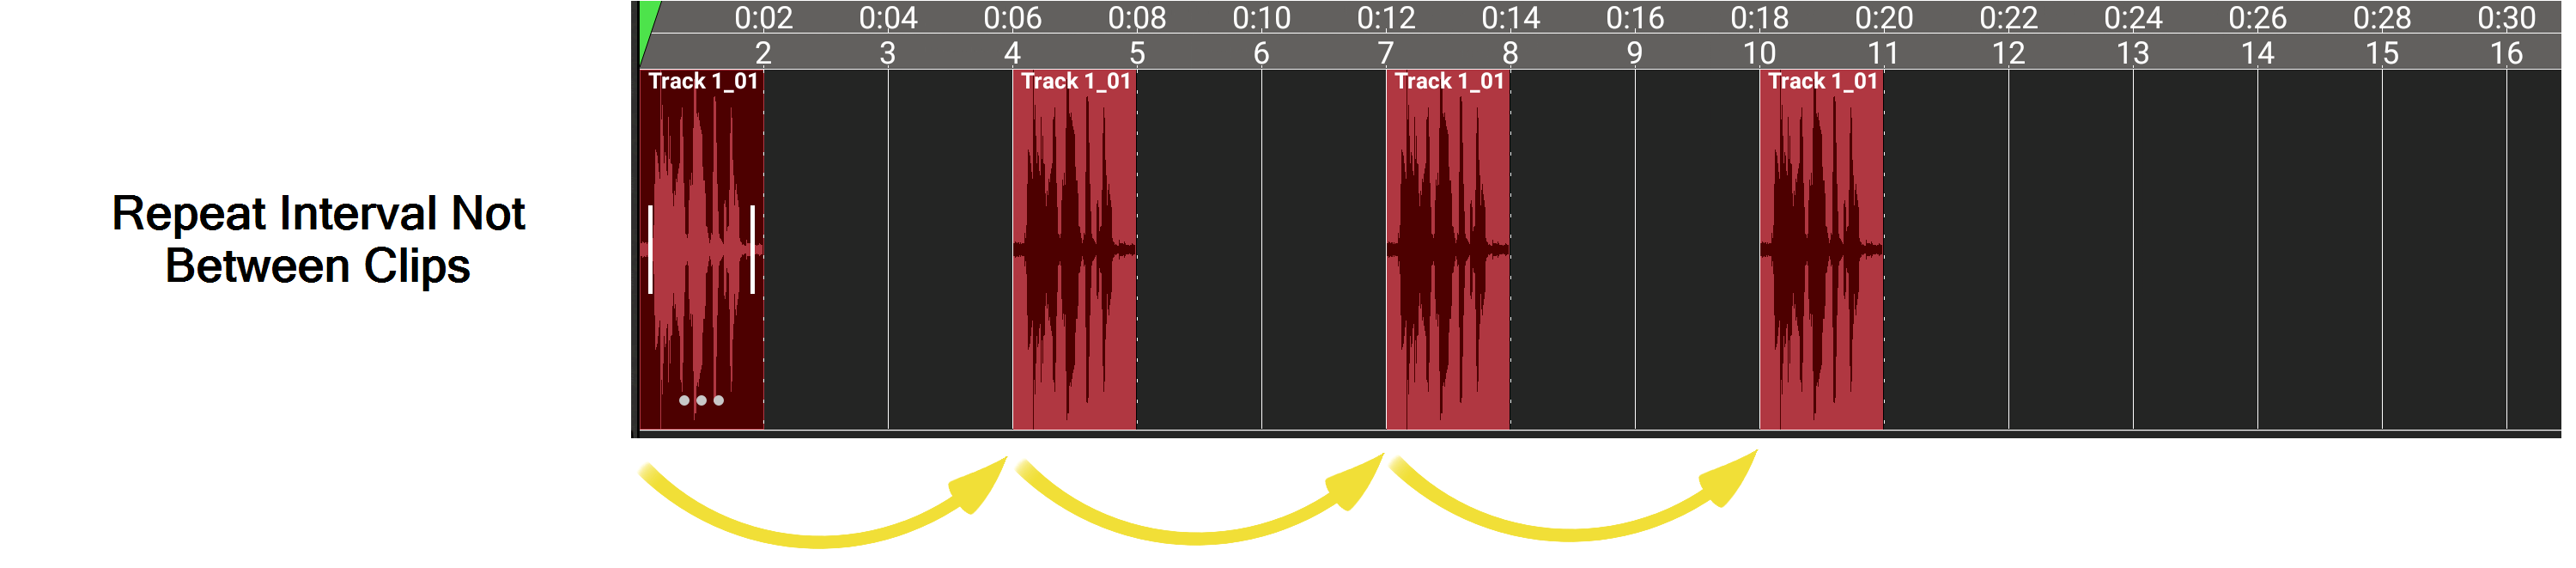
So, in the above examples, you can see how the selected clip is one bar long. The repeat dialog has been set to make three repeats with an interval of three bars. As you can see, when the repeat interval is set to 'Between clips', the three bar interval is applied between every clip meaning the three repeats start on bar five, nine and thirteen. When 'Between clips' is not selected, the three bar interval is applied based on the starting position of the original, and every subsequent clip. As such, the three repeats start on bar four, seven and ten.
Creating repeats like this can be incredibly useful, especially if you're working with audio loops. The repeat function can only be used on individual clips, not on multiple clip selections.
NOTE. This operation will be automatically canceled if the repeated clips would overlap with other clips already on the track.
Auto split (Android only) enables you to automatically split your clip into separate clips, or have markers placed accordingly, based on the values you enter in the Auto split dialog shown below. When the sound in the clip matches the criteria defined in the dialog, a new clip will be created at that point or a marker will be created on the timeline/marker display at that point if you'd prefer that. This can be very useful if, for example, you've made a long live recording and you want to easily split it into separate songs/tracks. Likewise, if you've made a long recording of a meeting or a lecture and you want to easily identify any moments of silence to then remove them, this can be help with that. And if you want to grab individual sounds from a sample containing multiple sounds, you can use auto split to easily separate them into their own clips.
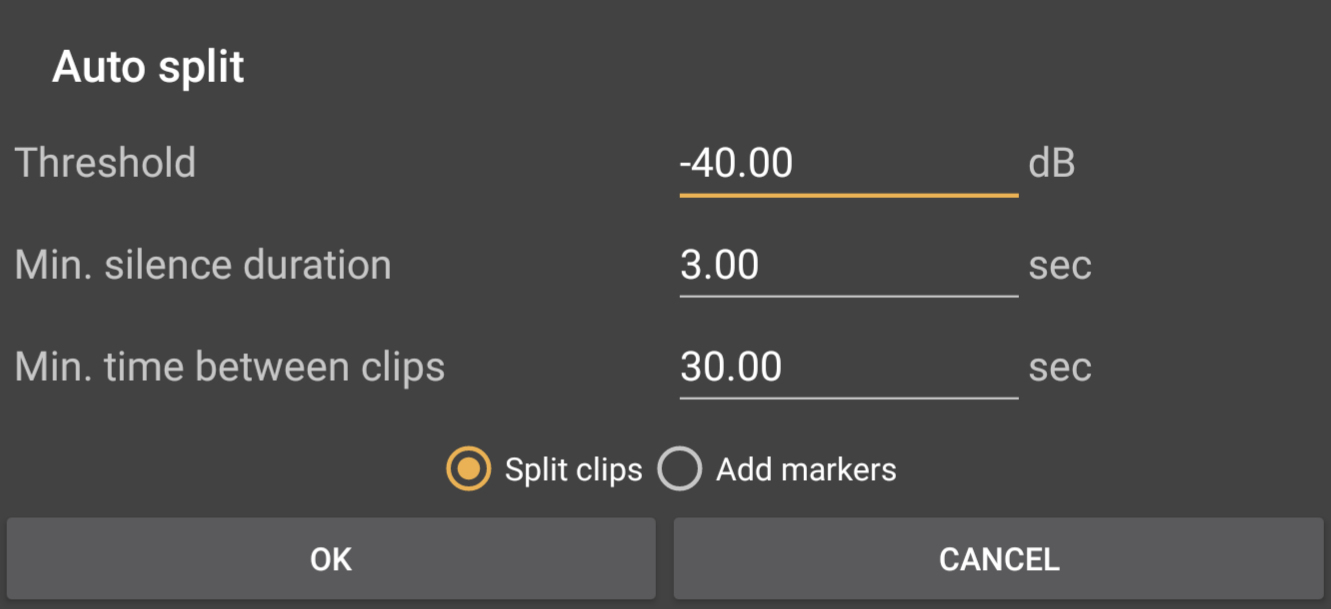
- Threshold sets the sound volume level for the auto split process. If the sound level drops below the threshold specified (and fulfills the other criteria here) the clip will be split at that point, or a marker will be placed.
- Min. silence duration allows you to set the minimum amount of time the sound on the clip must remain below the threshold (considered 'silence' for the sake of this process) before the split, or marker, will be applied.
- Min. time between clips allows you to specify the minimum amount of time necessary between clips for a split, or marker, to be applied.
- The Split Clips and Add Markers check-boxes allow you to decide whether you'd like the clip to be split into two clips at the point at which the criteria is met, or markers added to the timeline/marker display at that point instead.
So, here is an example. The following clip has two main areas of sound in the recording and we want to auto split those two areas of sound onto separate clips.
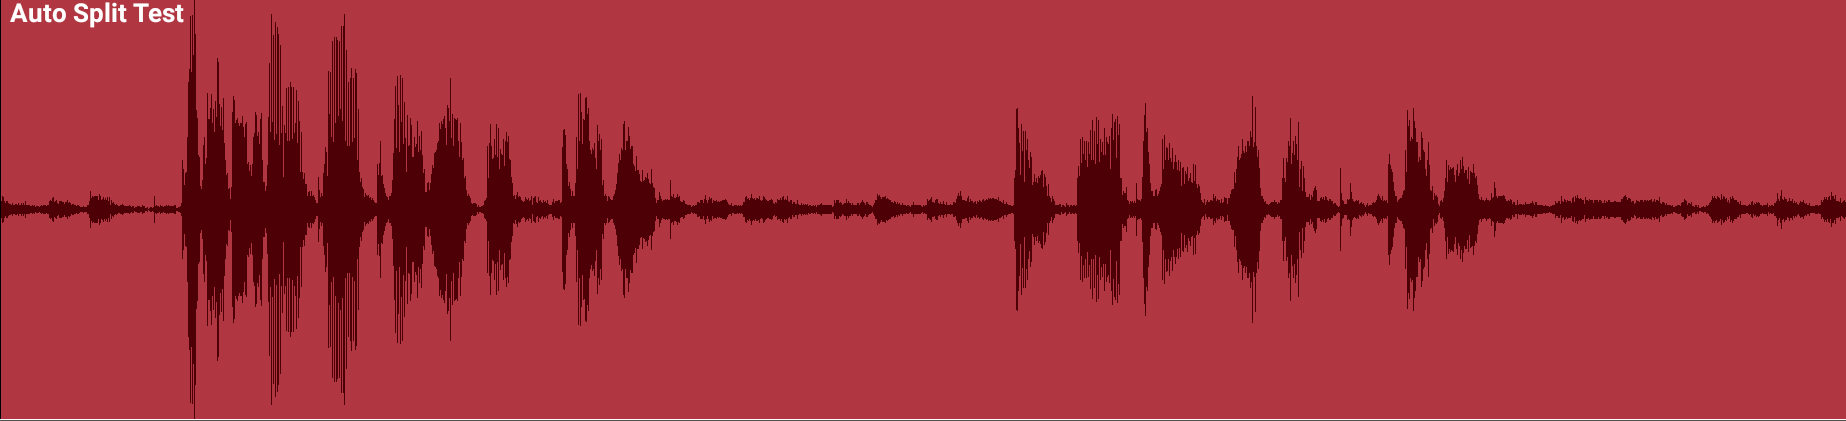
In order to apply Auto split successfully, you need to look and think about the reality of the sample/clip you're working with. If your recording was made in a rather noisy environment, there's no point setting the threshold level very, very low because the audio level will probably never drop that low and therefore no splits will be applied. Likewise, if your clip is very short in length, as this example is, there's no point setting your minimum silence duration, or your minimum time between clips to a relatively high value, because there simply just might not be clip available for those criteria to even possibly be met. In short, you need to tailor your auto split settings to your clip and the audio it contains. Just remember there is always the Undo ![]() function if you get your settings wrong and need to try again with different settings. As such, for the clip above the threshold was set at -20.00 dB because there is a certain level of sound over the whole recording and it never reaches 'silence'. Since it is a short clip, the minimum silence duration needed to be very low for the split criteria to be met within the clip, but not so low that a split would be applied every time the level dropped below -20.00 dB. As such, it was set to 0.25 seconds. And again, with the clip being so short, the minimum time between clips also needed to be low. As it happens, it was also set to 0.25 seconds. Here is the result.
function if you get your settings wrong and need to try again with different settings. As such, for the clip above the threshold was set at -20.00 dB because there is a certain level of sound over the whole recording and it never reaches 'silence'. Since it is a short clip, the minimum silence duration needed to be very low for the split criteria to be met within the clip, but not so low that a split would be applied every time the level dropped below -20.00 dB. As such, it was set to 0.25 seconds. And again, with the clip being so short, the minimum time between clips also needed to be low. As it happens, it was also set to 0.25 seconds. Here is the result.
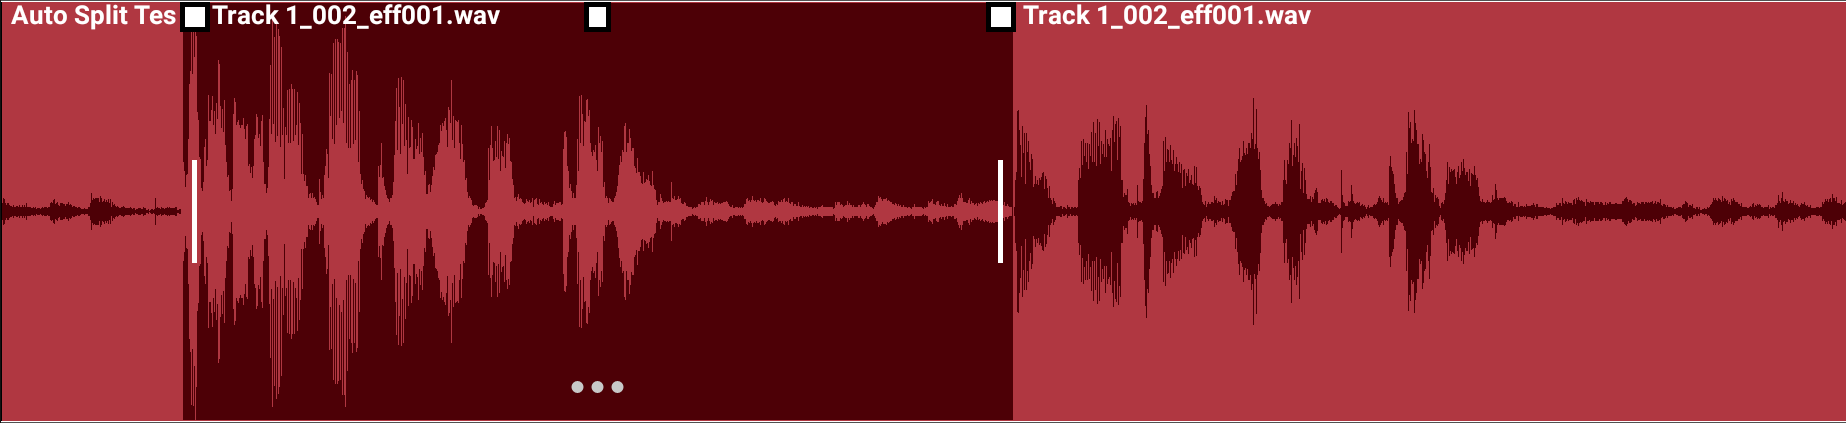
As you can see the original clip has been split into three clips giving the two main areas of sound their own clips (the middle clip has been selected so the three can be identified more easily). Before the first main area of sound there is at least 0.25 seconds below -20.00 dB, so a split is applied just before the sound rises above -20.00 dB and the main sound starts. After the first main area of sound, there is, again, enough 'silence' (below the threshold) to fulfill both the minimum time between clips and minimum silence duration. Therefore, another split is applied just before the second main area of sound rises above the threshold and we have our main areas of sound on their own clips as desired.
Delete sample from storage allows you to completely delete the selected sample/clip from the project folder on your device. As such, please use this with caution if you're not absolutely sure you want to lose the sample forever. This action cannot be undone. As such, you will see a confirmation dialog before the sample is actually deleted, just in case you select this option by mistake.
Connect to previous clip positions the selected clip so that its start is flush with the previous clip's end point on the timeline. You can do the same thing manually by turning on 'Clip magnet' in the Grid ![]() settings and sliding the clip (by touching, holding and sliding using the middle of the selected clip) until it snaps-to the previous clip, but this automatically carries out the process, saving you time. Please note that the clips do not remain 'connected' or 'chained' after this action: is just repositions the selected clip.
settings and sliding the clip (by touching, holding and sliding using the middle of the selected clip) until it snaps-to the previous clip, but this automatically carries out the process, saving you time. Please note that the clips do not remain 'connected' or 'chained' after this action: is just repositions the selected clip.
Connect to next clip positions the selected clip so that its end is flush with the next clip's start point on the timeline. As mentioned in the previous definition, this can be done manually, but this function can save you time and speed up your workflow.
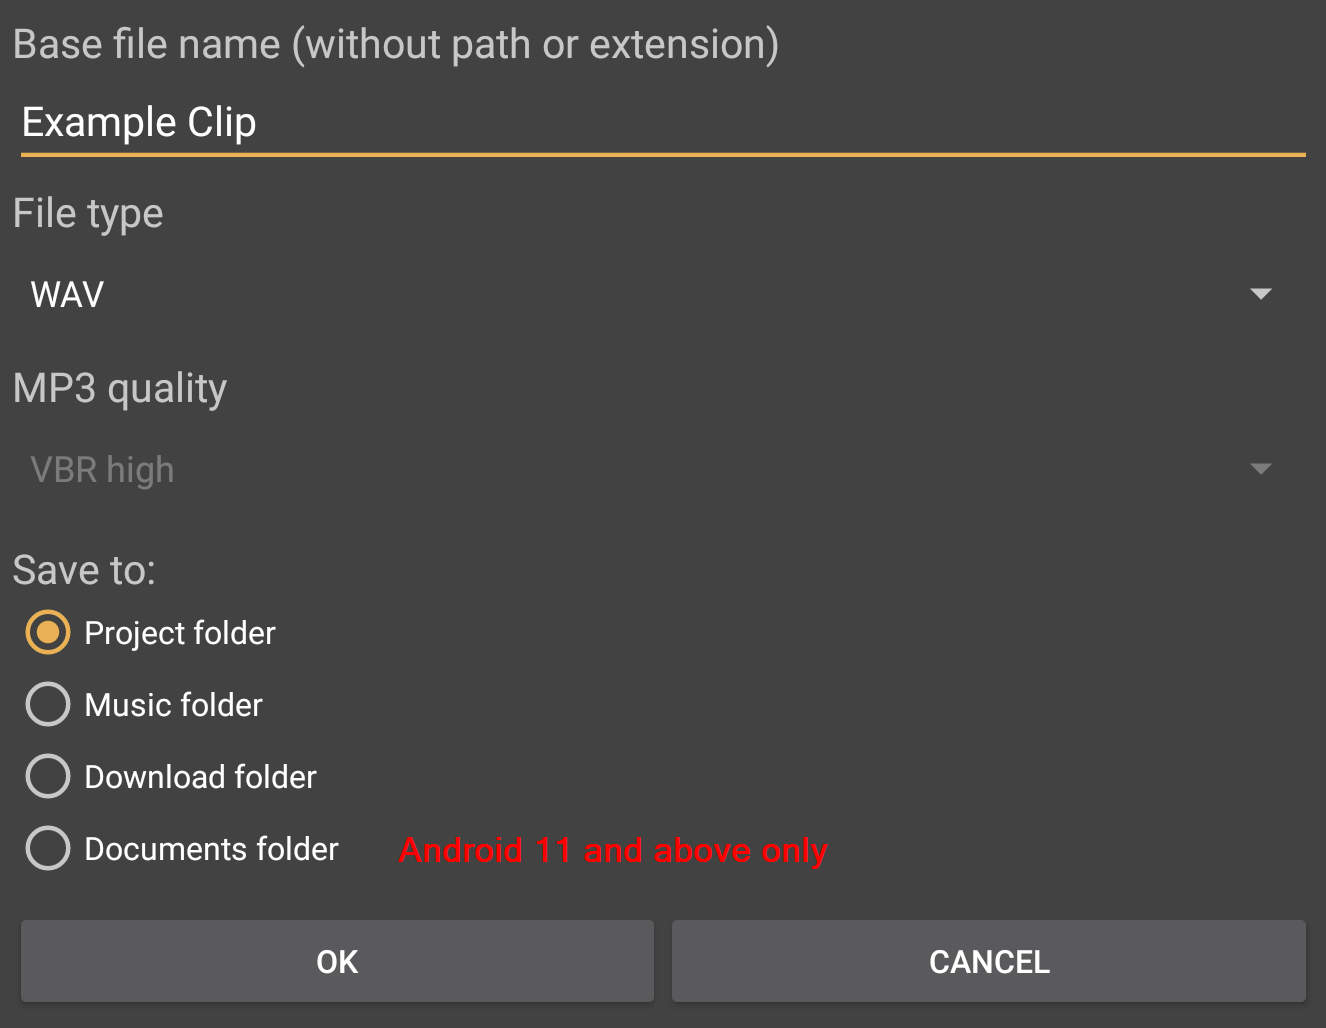
Save to audio file allows you to export the selected clip to an audio file. This function exports the clip audio only and will not include any processing or effects applied to the track in real time. If you have applied any of the effects mentioned at the top of this section, which are rendered to the clip itself, these become a physical part of the audio, so will, obviously, still have been applied to the audio exported. Selecting this option opens a dialog, seen below, allowing you to set the name and format for your audio export. You can choose to save the audio file to either the Project folder (where it can be found in the 'Samples' folder), the device Music folder, the device Download folder or (Android 11 and above only) the device Documents folder.
Set loop markers to clip bounds does exactly that: it places the loop start marker at exactly the start of the clip and the loop end marker at the end of the clip. This can be very useful if, for example, you want to hear the clip constantly repeating as you make adjustments to perfect the sound for your project.
Set punch in/out markers to clip bounds does the same with the red punch in/out markers: it places the punch in marker at exactly the start of the clip and the punch out marker at the end of the clip. This can be very useful if you want to punch in/out to re-record the clip but leave everything around it intact and unchanged. It could also be used if, for example, you want to record several versions of the section of audio contained in the clip by selecting a different track for each recording take and then selecting your favorite take to use by utilizing Undo and Redo.
Track options... is the final option here. It opens its own menu of options, covered next, which are related to the track on which the selected clip sits (as opposed to the options listed here so far which relate to the the specific clip selected).
Audio Track Options
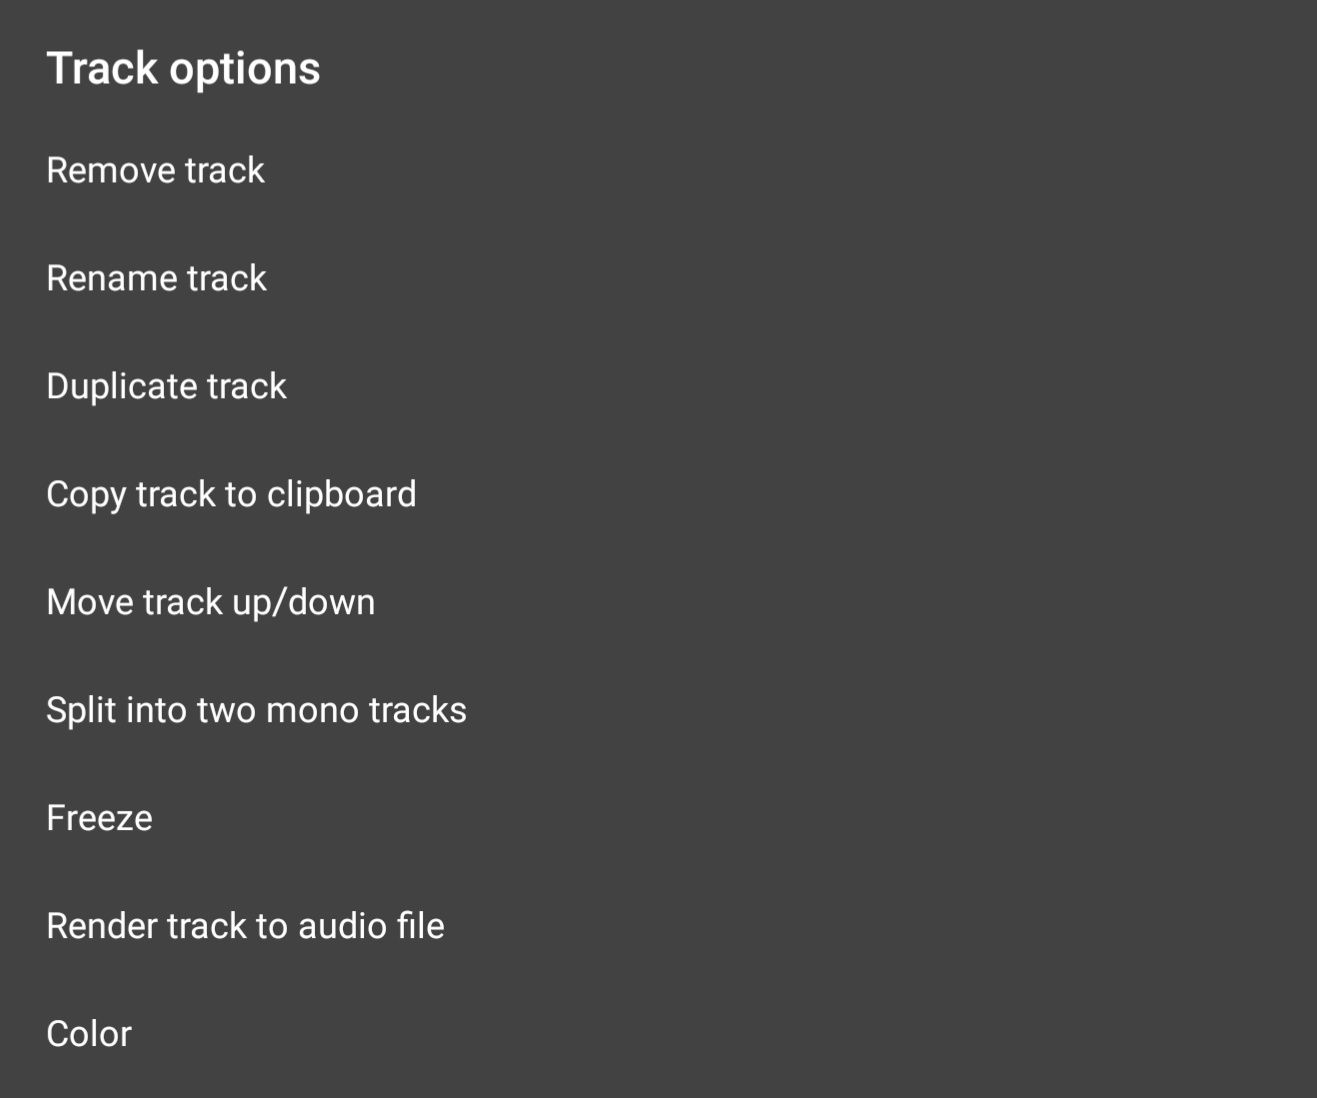
NOTES. The track options seen here can also be accessed by long pressing on any empty area of the track not containing a clip.
Paste will also be displayed if something has been copied to the clipboard. For full details on pasting content, please see here.
Unfreeze will be displayed instead of Freeze on tracks which have been frozen.
Split into two mono tracks will, obviously, not be an option for mono audio tracks.
Remove track removes the entire track, including all of the clips on it, from the project. This action can be undone using the Undo ![]() button if selected by mistake, and it does not delete your audio clips/samples from the project Samples folder on your device.
button if selected by mistake, and it does not delete your audio clips/samples from the project Samples folder on your device.
Rename Track allows you to give the track a name to suit your needs instead of the automatic 'Track 1, Track 2...etc.'. The track name can also be changed by long-pressing on the display of the track name on its channel strip.
Duplicate track creates an exact copy of the entire track in its current state and places that copy on the track below it. The default names of tracks (Track 1, Track 2...etc.) below the one created by the duplication will have their track names changed accordingly to account for the extra track added.
Copy track to clipboard copies the entire track to the clipboard. Once something has been copied to the clipboard, Paste will also be shown in the Track Options shown above. To Paste ![]() the copied track to a different part of either the same track, or a different track, you need to position the Time Marker
the copied track to a different part of either the same track, or a different track, you need to position the Time Marker ![]() to the desired position before pressing paste. To paste onto a different track, remember to select that track by tapping it once before pressing paste. To paste onto a new track, you will first need to add an empty track using the Add Track
to the desired position before pressing paste. To paste onto a different track, remember to select that track by tapping it once before pressing paste. To paste onto a new track, you will first need to add an empty track using the Add Track ![]() button.
button.
Move track up/down opens a dialog which allows you to move the selected track to your desired position in the display of tracks in the timeline area.
Split into two mono tracks is an option only available on audio tracks containing stereo audio clips. It does exactly as it says: it splits the left and right channels of the stereo track into two individual mono tracks on the timeline. This can be useful if you accidentally recorded in stereo from a stereo USB audio interface and only connected something to either (mono) input. This would result in a stereo audio clip where only the left or right channel would contain audio. Splitting the track into two mono tracks and removing the silent track would resolve this situation.
Freeze allows you to temporarily render all clips, with all processing and effects into a single audio waveform on the track, rather than that processing and effects being applied in real time to the original audio clips. This process removes any effects and resets any processing for the frozen track, which means lower CPU usage. This is why this function can be so useful and should always be remembered as an option if your device is struggling to cope with the CPU load of real time effects and multiple instances of virtual instruments. The Freeze process is reversible but PLEASE REMEMBER, any changes you make to a frozen track will be lost when it is unfrozen, as it will return to the state it was at when Freeze was applied. The Track Options shown above will display Unfreeze on tracks which have been frozen. For more details on freezing tracks, please see here.
Render track to audio file enables you to export a fully rendered audio file of the selected track. This means that (unlike the Save to audio file option for individual audio clips) the results of all processing and effects applied will be included in the exported audio file. The rendered audio file can be found in the project Samples folder after export. Pressing 'Render track to audio file' opens the following dialog, allowing you to tailor the export to your requirements. Please ensure that the track's peak volume level is below 0dB to avoid any clipping and distortion on the rendered track.

- Base file name (without path or extension) allows you to name your exported audio file. As it says, don't include any path or extension, just enter your desired name. The Base file name 'Example Track' has been entered in the screenshot above. It's also best to stay clear of characters like /, \, #, *, % etc. when naming the file since it could clash with file system commands.
- Resolution allows you to select the bit depth resolution for the exported audio file. If you're not sure what bit depth is, please see here. Which bit depth resolution you select depends on what you plan to use your exported audio file for. The higher the resolution, the bigger the resulting audio file. When exporting your track with plans to import into another DAW for further work you're probably going to want to select 32-bit or 32-bit (float). The Resolution options will be grayed out if OGG or MP3 are selected as the format file type.
- File type is where you can select the file format for your export. The options are WAV, AIFF, FLAC, OGG and MP3. WAV, AIFF and FLAC are lossless audio types, whereas OGG and MP3 are compressed. If you want to send someone an audio file by email or perhaps social media, it may be best to select MP3 to keep the file size small. Trying to email a lossless audio file will usually fail due to the file becoming too large.
- MP3 quality will have its options grayed out unless MP3 is selected as the export format in File Type. The MP3 quality settings offer the full range of VBR (Variable Bit Rate) and CBR (Constant Bit Rate) options to cover all requirements.
- Only export time span defined by range, when selected, does exactly that: it only renders and exports the area of the track defined by the Range
 function.
- Append track name, if selected, will add an underscore ( _ ) and the track name to your Base file name. So, in the example above, if the track being exported was the first track in my project and still had its default name (Track 1), having 'Append track name' active would result in the exported file being named 'Example Track_Track 1.wav' (assuming WAV was selected as the file type format).
- Mono, when selected, exports your track as a mono audio file rather than a stereo one. This results in a smaller file size but, obviously, any sense of the stereo sound field (from the audio on the track itself if it is stereo, or from 'spacial' effects applied to either mono or stereo audio on the track) will be lost.
- Include effect tails is selected by default and you will almost certainly want to keep it selected. 'Include effect tails' adds enough time to the end of the exported file to ensure that the 'tails' (fades to silence) of any effects will be included. So, for example, if you have a reverb effect with a long decay time applied to your track, you'll want the reverb decay/tail/fade to silence to be included in your exported audio file rather than have it cut off abruptly when the audio on the original track ends. Likewise, if you have a virtual instrument with a long release time, you'll want to have 'Include effect tails' selected to ensure that the full release/fade to silence of notes right at the end of the track are included in the exported audio file.
- Export to allows you to select the destination folder for the exported file. You can choose to save the audio file to either the Project folder (where it can be found in the 'Samples' folder), the device Music folder, the device Download folder or (Android 11 and above only) the device Documents folder.
NOTE. The maximum possible amount of time added onto any track in order to include effect tails and instrument releases is ten seconds.
Color allows you to change the color of the clips on your track. You can either use a color picker to completely freely choose a color or you can choose to apply the same color as any of the existing tracks to the selected track. This can be very useful if you want tracks with a similar content type (say, vocal tracks) to have the same color for easy identification. Likewise, if you have several tracks routed to a single Group in the mixer, you may want them to have the same color. Don't forget that this can be combined with the 'Move track up/down' function, allowing you to place such tracks next to each other on the timeline too.